
PEAK
PRIME 2.0
Thank you for purchasing our PEAK Prime 2.0 pellet grill. Here are a few things to get you started.


Before you fire up your grill, make sure the back and sides of grill are atleast 36 in. from any combustibles. This is a minimum clearance from the unit to any combustible materials.
DO NOT use the grill under any overhead combustible surface for fire safety reason as well as proper ventilation.
ALWAYS reference your owner’s manual for all safety information.


Tap. Zoom. Rotate with official interactive instructions on the BILT App. If viewing from your phone simply click the QR code or if viewing on a computer scan the QR code with your phone to download and access the BILT 3D instructions for fast & easy setup.

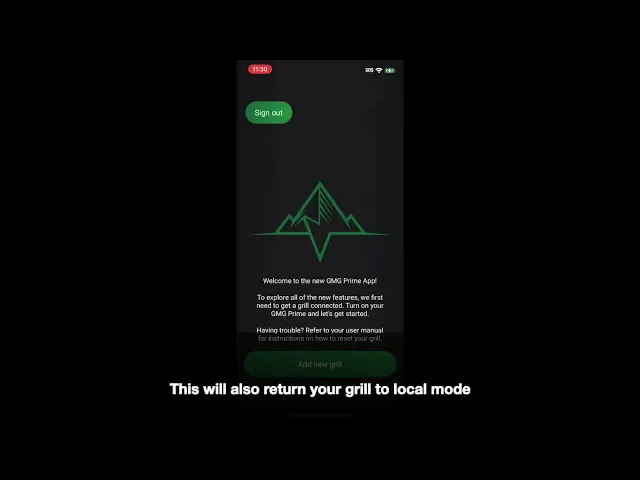
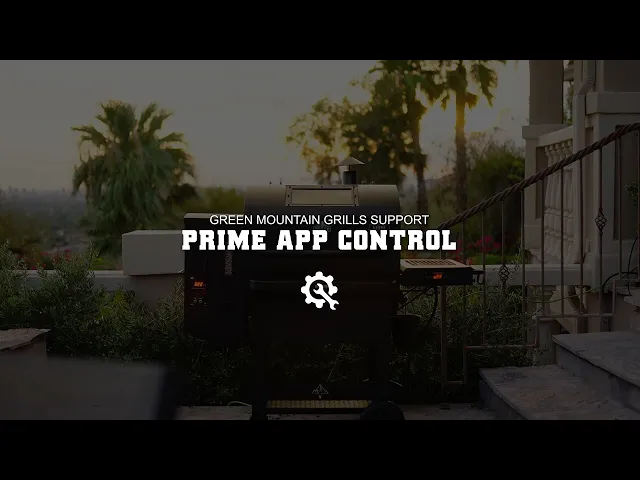
How to connect your GMG
PRIME APP


Apple
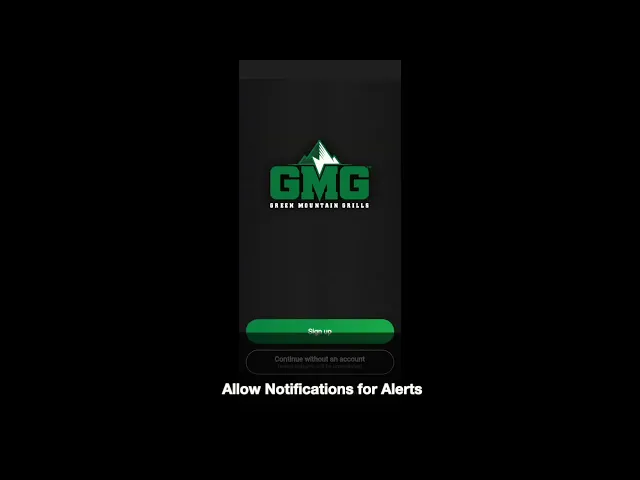
Android
TIP: The serial # on the back of your grill is your grill’s WiFi password.
How to update your grill's
FIRMWARE
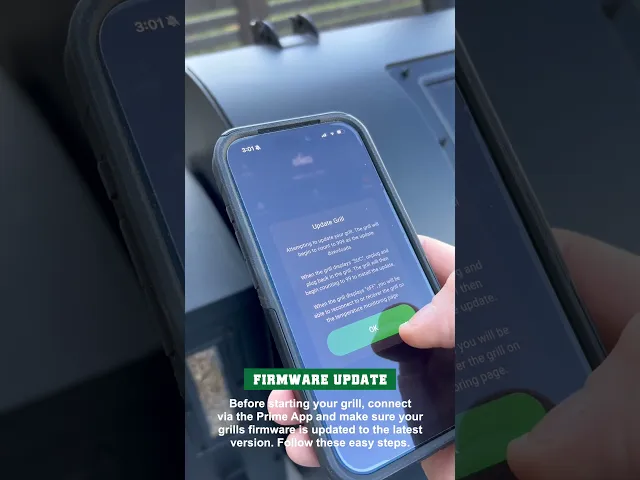
IMPORTANT: Before firing up your new grill make sure your grill’s firmware is updated to the latest version. Connect to your grill via the GMG Prime App and follow these easy steps.
If for some reason you run into trouble connecting to the app/updating, please reach out to our App Support. They can be reached here at 800-603-3398 ext. 15, Mon-Fri 8am-4pm PST or send an email to support@greenmountaingrills.com

Proper installation of
HEAT SHIELD

PEAK PRIME 2.0
Approximately 14.5″ from inside left wall of grill
Heat Shield
ADJUSTMENT ROD
IMPORTANT: For a proper centered heat shield position, use the marks on the adjuster handle. The grill wall should align with the “0” mark on the handle, setting the heat shield roughly 14.5 in. (368.3 mm) from the left inside grill wall.
IMPORTANT: DO NOT over tighten the adjustment rod.


How to Install
GREASE TRAY

VERY IMPORTANT:
Install the grease tray with the circle cut-out to the left and the half-moon crescent to the right. This ensures proper travel of grease into your grease trough. For easy clean up, use grease tray liners or wrap the grease tray in tin foil.

Close doors & lids for
PROPER AIRFLOW
IMPORTANT
Always ensure the hopper lid, pellet dump and AshVac doors are closed while operating the grill.

Understanding your
POWER OPTIONS
Recommended steps for
PRIMING THE FIREBOX
You must prime the firebox the first time you start the grill or any time you accidentally let the auger tube run out of pellets.
- Remove grates, grease tray, and heat shield.
- Plug the grill in and press the red POWER button.
- Display will show ‘0’. Wait until it changes to ‘1’. and unplug the grill.
- Plug the grill back in and press the red POWER button.
- Repeat Steps 2-4 until pellets begin to emerge from the end of the auger tube and fall into the firebox.
- Replace grates, grease tray, and heat shield.
- Allow the grill to finish it’s 0-1-2-3 startup cycle and reach 150°F before you set your desired temp.

Important steps for
SEASONING YOUR GRILL
Burn-in the grill at 350°F for 30 minutes to remove any residue from the manufacturing process.
 30 mins
 350°F
350°F
 ALWAYS allow your grill reach 150°F before adjusting the temperature.
The grill will make
ODD SOUNDS

Huffing sounds are normal.
The combustion fan inside the hopper will turn on and off regularly to provide the correct amount of oxygen to the fire to maintain your set temp. The motor that propels the auger is fairly powerful and is thus a bit loud. This is all normal operation.
How to correctly
POWER DOWN
- Press the red POWER button.
This will shift the grill into “FAN” mode. You will hear the fan kick in and you may hear the auger motor turn intermittently. The grill extinguishes the fire at a rate dependent on the actual temperature when you pressed the power button. - Unplug the grill from the wall.
After first use steps for
STANDARD STARTUP
ALWAYS allow your grill reach 150°F before adjusting the temperature.
- Plug the grill in (if unplugged) and turn it on by pressing the POWER button. Display will show “0” and begin it’s 0-1-2-3 start-up cycle.
- Allow your grill to reach 150°F before setting your desired temp.
- Set your temp and get cooking!
Recommended regular
GRILL CLEANING

ABOUT
EVERY
2-3 BAGS
80-100LBS
ALWAYS ENSURE THAT THE GRILL IS COLD AND THE FIRE IS OUT BEFORE CLEANING.
Keep the inside of the grill clean using a Shop-Vac. This will take only a few minutes. Remove the interior parts and vacuum any ash and residue out of the base of the grill and the firebox. WAIT AT LEAST ONE HOUR AFTER TURNING OFF THE GRILL BEFORE USING THE ASHVAC.

AshVac Clean-Out
Use this method to easily clean out the firebox without removing any internal parts. Open the ash clean-out door located on the right side of the grill. Place the end of the vacuum hose over the hole of the clean-out tube that runs into the base of the burn pot. This will remove most of the excess ash from the firebox. THIS DOOR MUST BE CLOSED WHEN OPERATING THE GRILL.
Connecting and using your
MEAT PROBES

To use this feature, just plug the connector into the receptacle on the front of the controller.
Lift the stainless flap on the left side of the grill and push the probe through the hole. Then, insert the probe into the center of the food you are cooking. Press either the Probe 1 or 2 button to display the temperature of that probe. This process takes a minute or two to stabilize.
To return to the grill temperature display, simply press the probe button again. If you do not have the probe installed in the control panel, then your digital display will read “NFD” (no food) when you press either probe button. The probe is not suitable for reading temperatures above 257°F (150°C).
Understanding the 0-1-2-3’s
STARTUP CYCLE


Understanding your grill’s
AIR TEMPERATURE
The PT200 Platinum Sensor sends data to the computer. This “brain” analyzes the data and adjusts the airflow and pellet fuel flow to maintain the set temperature. Many things affect the data gathered by the sensor–opening the lid, wind, grease splatter, humidity, altitude, and gravity (if the grill is not on level ground).
The computer analyzes all the erratic information and averages it over time. Then, it displays the best result as the most accurate representation of the grill’s current temperature. This is why an instantaneous air temperature reading from a third-party product does not provide much useful information.
Have questions or need
SUPPORT?
COMPONENT CHECK
Need support? No problem! A quick and easy way to asses your grill at home is by running a component check. Follow these easy-to-follow steps.
Need more instruction?
Check out our Service & Support video section >
Need support? Go to:
Support Page >
Grill Warranty
REGISTRATION
Register your grill and enter to win some of our Pro Accessories or a free bag of Pellets.